"It's the little things in life which make it magical..."

Wednesday, 6 February 2013

Alphabet Series - "K"


Valentine's day will soon be upon us, and whilst the societal focus of the day seems to have shifted towards dating-status, I have adopted a different approach. I use it as a reminder to take the time to let those who are integral in my life, know that I feel so blessed to have had the opportunity to know them...Celebrating those who are special to me has re-ignited my art-making, as I loving giving to others, and bringing joy, and luckily my hobbies have the ability to bring joy to most people :)

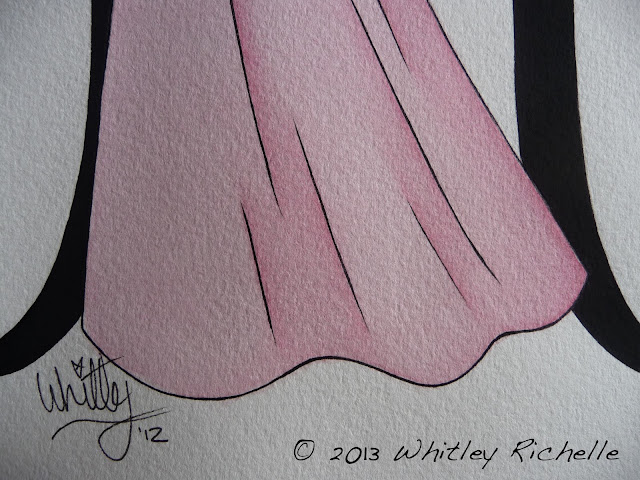
This alphabet illustration is a lot more simple than the others I have been making, it was however the first one I had drafted back in July, before I dove into the project in November with more developed characters. Nevertheless, I still love it, as it is such cute character and the look is quite sweet and perfectly suited to the recipient, a most genuine and lovely young lady :)


There are many ways to give, with words and acts often being much more meaningful than other forms of gifts. So embrace the day as an opportunity to acknowledge the special people in your life...

Happy Giving :D

Sunday, 27 January 2013

Alphabet Series - "S"


Here's another illustration from my alphabet series which I made for my Aunt's christmas gift. I really enjoyed making this one, because I was in the zone, and having fun with doing a 70's style dress, seeing as that was the time of my Aunt's youth :)

I got the pose idea from the Snow White DVD cover and used a couple of different magazine clippings to develop the wavy hair design. The hair worked out a lot quicker than previous illustrations! I used cerulean blue for the dress, using the faintest of washes and then layering countless times and slowly doing more in the shaded areas to achieve the ombre look. The hair is a reddish-brown I created using burnt umber and alizarin crimson. The skin uses faint washes of burnt umber, with tinges of rose on the elbows, hands and feet.


The letter 'S' is so much easier to work with than other letters, as you can pretty much use whatever pose you desire, whereas with others you have to be careful in the body's placement for it may be difficult to tell what the letter is!


It's currently raining cats and dogs here...so my question is what are your go-to rainy-day activities? Mine are pretty much the same as those I generally enjoy doing! But I do love bunkering down and watching a good movie with some hot chocolate too :)

Happy Fairy Dusting! :D

Wednesday, 16 January 2013

Alphabet Series - "A"


Just a quick post of another one of the illustrations I made as a christmas gift. I tried a number of different things with this piece, using smooth watercolour paper (which I didn't like that much as it shows up mistakes), did a shorter dress design and tried to make it look like she was swirling it. Also, because of the different pose it took me ages to develop the final layout as the hair, dress, limb and head positions needed a lot of tweaking to sit 'right'.


I still have plenty of illustrations to keep showing you, but I've been having a break from drawing and instead been reading and researching quite a bit. This has been great for my imagination, developing new ideas and getting enthused about being creative again!

Enjoy, and happy fairy-dusting your day! :D

Wednesday, 2 January 2013

Young Jack Skellington


Well Hel-looo 2013!

Albeit a couple of lull periods, I continued to blog throughout 2012, and I'm so glad that I didn't neglect it too badly... It's been incredibly nice to have something to work on and nurture, so thanks for being supportive of this for me :)

I intend to keep going with this venture, firstly for myself, because you will struggle to maintain doing something if your sole priority is to please others and not stay true to enjoying it for you...and secondly for you guys, my readers, to bring you more ways to add fairy dust to your day, and thus make your life sparkle :D


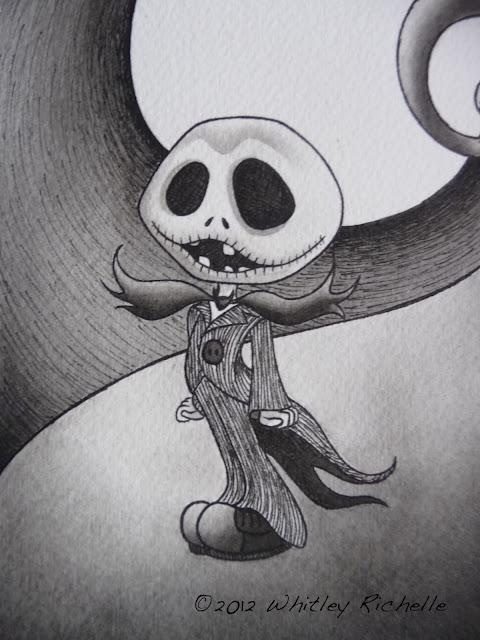
Here is an illustration made for my sister's friend, whom loves all things Jack Skellington from The Nightmare Before Christmas. I created the layout of the piece surprisingly quickly, despite never having drawn him before. I started by doing a couple of practice studies of Jack from internet images, before deciding on the final look, and then created a polished final layout. I was so pleased with the end result, and I hope you like it to :) It was such fun to do, especially because it was quite different to my typical illustration style, and also because I enjoyed doing the background, which I normally don't do :)

I recently created a facebook page for this blog, so feel free to "like" it, so to get notifications of new posts, and also for the links and ideas I find for other great ways to add magic to your day!

Happy Fairy-Dusting Your Life :D

Thursday, 13 December 2012

Sm'opcorn


Having a movie-night is one of those things in life which brings me great joy :) Nothing beats chilling on the couch with a succession of good ol' DVD's. My family has never been big into the whole snacking during the movie thing, but when they do it's usually chips, and chips don't really do it for me... So here's something which did do it for me, and it only took 10 minutes or so to make! It's "s'mores" crossed with popcorn, thus the moniker "sm'opcorn"!

The beauty with sm'opcorn is that you can make it however you like, and using whatever you have available in your pantry, as there are no rules! Below is what I did, but feel free to use any type of chocolate you like, any type of cereal, use rainbow marshmallows if you want to make it look pretty, and you could even butter the popcorn first (I know you thought about it!) =D

Ingredients

- Popcorn
- Cereal (I used gluten-free nutri-grain, but you can use any cereal you like, such as branflakes, weetbix or milo cereal)
- White marshmallows (chopped in half)
- Dark chocolate (I used 100g, use more if you want it more like rocky road)

Method

Line a large tray with some aluminium foil.

Make up the popcorn (I use a popcorn machine), and place a decent layer of it over the entire tray.

Sprinkle with the desired amount of cereal.

Place marshmallows on top, and grill for a couple of minutes until 'mallows are nice and toasted.


Meanwhile, melt desired amount of chocolate, and drizzle all over the mix when it has finished being grilled.


Place tray in the fridge until the chocolate is set.

Then you can break off chunks of sm'opcorn and consume as desired!


Happy Baking and Movie-nighting :D

Tuesday, 4 December 2012

Baking Bouquet no.1


So here is it, Temptation Tuesday. Just when you thought you had been doing sooo well, so far this week...I apologise in advance, but these recipes were just too good to wait until Temptation Thursday!

My idea is that with the recipes that I hardly amend, but still want to share, I'll post in groups as baking-inspiration for you, to add a little fairy dust to your day :) With the recipe title giving you the link to the recipe. This weeks' baking-bouquet candidates are real goodies, well, I'm not about to post non-awesome recipes for you am I? :)

Monkey Bread

I have had this recipe in my "to-make" stash for over a year, and always went for something else because I thought it was too hard, but one day I just said "let's make it!" And it is no-where near as hard as it looks! The basic process is: make the dough, let it rise, cut it into 64, roll into balls, dunk in butter, dunk in brown sugar, fill cake tin, let it rise again, bake, then eat!

And O-EM-G, do you eat! It is rather addictive...so I recommend making it when you have lots of guests coming over/or when you do not have an uncontrollable appetite/or when you are not trying to be healthy...for bringing this baby out of the oven will ruin everything. Just one, crunchy, buttery, morsel of this sweet brioche will end all of your adult rationality!


Spiced Blondie

If the steps in Monkey bread still scare you, this one won't, as it's quick to make and bake. It tastes a little like gingerbread, but way more awesome, because it's dense and chewy like a brownie. Don't fear if the centre of the blondie looks uncooked, for it tastes amazing that way! This is one of those batter's where you can eat, without the need for an oven ;P The basic process is: melt butter, add that to sugar, mix in eggs, add the flour and spices before baking to dense-caramelly-spiced perfection! I also recommend that you have a few partners-in-crime around when making this one, as it is mighty fine straight from the oven also =D


Sticky Chocolate Date Loaf

This is a great vegan recipe, because it is quite fudgy with only a slight crumble to it, so you don't miss the eggs or dairy! This is really great when you have a beyond-edible banana (I know I'm not the only one who has neglected a banana in the fruit bowl before!), but not enough for banana cake. Some small amendments were that I used rice-bran oil (as not all canola's are from the canola plant but a harmful rapeseed plant), didn't add the salt (as when I do all I taste is salt in my cake :P), used seven rows of good chocolate (instead of the 1 cup of choc-chips) and baked it at 170°C for 50mins.


I hope you enjoy these recipes, and that you are tempted enough to try out one, or all of them sometime to make your day magical!

Happy Baking! =D

Monday, 3 December 2012

Galaxy Gazing


So, you know how with my last post I said I was unorganised when I attended that art class? Well, last week was worse...I was down to literally my last scrap of watercolour paper, which was not even A4 size, and grabbed like seven images I had in my inspirations folder to potentially use as my subject for the class, but was gonna miss the next bus anyway...So I just sat in my chair and looked through images on my laptop whilst waiting to leave for the next bus, when I came across this image...
It's a gorgeous artwork from the Disneystore I found ages ago, and I decided then and there, that that's what I'd paint, a space-like sky with a mermaids' silhouette. It was such fun to do and quite simple, after so much self-induced drama. I just lightly drew a circle for the moon, then throughly wet the paper leaving the moon dry. Then made up lots of different purples, greens, blues, sloshed on areas of yellow and pink, before blotting on the darker pigments. It doesn't look really pretty until the paint and paper have done their magic, and then allowed to dry. I then made a dark red and purple and painted in the mermaid and rock. Then using white and the tiniest point of my brush dotted hundreds of dots to represent the stars :)

I hope you like it! It looks better in real life, as my camera does not do justice to attempted close-up photography (I'm working on getting a suitable one)...Hopefully your Monday wasn't too manic, and if so, remember there are so many little things you can do to still make it magical!

Happy painting =D