"It's the little things in life which make it magical..."

Tuesday, 7 February 2012

Princess Series - Belle


I did promise that I would post what I've been up to, so here they are...enjoy!

Monday, 6 February 2012

Curiouser and Curiouser


If you know me, you know that I threw a 'Mad Hatter's Tea Party' to celebrate my 21st Birthday. You would also be aware that I love planning parties...this however all eventually leads to one experiencing post-party blues where one is lost with what to do, now that your cake taste-testing and teacup collecting days are behind you...

Thus, I threw myself into illustration, a pastime which has found itself neglected until recent months!

Over the past few weeks I have been doing a fair bit of illustration, and this Alice in Wonderland inspired piece sets the tone for the style I have been experimenting with. Using animated characters as a point of reference, I have been modernising them by making them glamourous and grown-up.


I'm quite happy with how Alice turned out, cartoon-esque, without being little-girly. I was trying to capture the mood of Alice running from the garden, the point where she realises that things are not always what they seem, and thus the piece is entitled 'Curiouser and Curiouser.' She was created using A3 300gsm watercolour paper, with a 2B pacer and Derwent watercolour pencils.

I hope that you like this style of illustration and that you are inspired to try and revamp your own favourite film or book character!

Let me know whether you, or anyone you know may be interested in participating in an 'Art Club'. Whereby, each month a theme is chosen, and at the end of the month all participants submit the work they have produced which reflects their interpretation of the theme to me. I would then publish the submission of the month :) Media used is up to the artist, photography, watercolour, pencil, the options are only limited by your creativity!

Happy Drawing.

Monday, 23 January 2012

Baked Bean Dip with Flat Breads


Sometimes, on the weekend you don’t feel like eating salad for lunch. You need a little something more, to congratulate yourself for the past week…Beans might not be your thing, but they are definitely my thing. Beans make a salad a meal and nachos delish, so why not enjoy them all on their own as a moorish bubbling and cheesy baked concoction…hungry yet? I am and I only recently had breakfast…

This dip has done the rounds at my place. So much so, that it has almost reached food-group status, like its second cousin twice-removed chocolate mousse.

The homemade charm and taste is enhanced by making your own flatbreads, soooo much better than store-bought “Frisbees”! Whilst they take a little more time than heating up packet ones, they really are simple to do, so trust me you won’t regret the extra effort!

Bean Dip

Lovingly adapted from a Coles brochure.

Ingredients

1 Small Brown Onion
400g tin Cannellini Beans (drained)
¼ cup Mayonnaise
1 clove garlic (crushed)
1 tsp Worcestershire Sauce
½ cup grated parmesan
Breadcrumbs and Extra Parmesan

Method

Preheat oven to 170°C (fan forced).

On medium heat, in a small pan, cook finely chopped onion until browned. Set aside.


Blend beans, mayonnaise, garlic, Worcestershire and half the parmesan, with a stick blender or food processor until smooth.


Mix in the onion and remaining parmesan. Place into a small baking tin, sprinkle with breadcrumbs and extra parmesan.

Bake for 20 minutes, until browned and bubbling.


Tortillas

Lovingly adapted from Donna Hay Magazine Oct/Dec 2011

Ingredients

1 cup Plain Wholemeal Flour
10g Butter
1 tsp Sea Salt (ground)
160ml Boiling Water

Method

Place flour and salt in a heat safe jug. Add the butter and mix with fingertips, until flour is the consistency of breadcrumbs.

Add the boiling water, and mix in well with a spoon.


Place mix onto a well-floured surface, and knead until it forms a dough.


Cut into 6 even segments, and roll into 20cm diameter rounds.

On medium-high heat cook each round separately in a non-stick pan, for approximately 2 minutes a side, until browned.


Cover breads with a tea towel to keep warm whilst dip is baking.

Notes

Serves 2 for lunch. Double recipes, when serving at a party nibbles table.

If you have leftover dip, store it in the fridge and reheat in microwave or oven…Do not eat cold, as tastes feral!

Happy Baking.

Saturday, 14 January 2012

Back To School Party


Sorry for the absence my LPOFD (little pinch of fairy dust) friends, I'm now back, and ready to bring you more cute and joyous things to do in your free time this coming 2012...

It’s been a long time coming, but here is my first party-theme post!

To celebrate the imminent recommencement of studies for the year, we had a little celebration Old-School-style. It was great fun dressing up in School-girl-esque attire (think netball skirts, long socks, pigtails and ribbons) and eating from our very own ‘tuckshop’ filled with scrumptious mini-foods and treats, before settling down for a Glee marathon sesh…such a fun night was shared by all!

This party layout would work equally well for a “School’s Out” celebration or a School Breakup shindig. Even if you are no longer in School, this theme is even more fun due to the cute nostalgia of it :)


Here’s a list of the ideas and items you can use to re-create the look...

Decorations

·      Red, green, black, white and wood colour scheme
·      Mini blackboard
·      Locker
·      Jar of paintbrushes
·      Pile of books
·      Drawing mannequin
·      Apples
·      Owls
·      Milk bottles with ribbon
·      Posters of celebs and pictures of your memories
·      Paper bags
·      Milk cartons
·      Giant stationary
·      World map globe


Tip – You could make your event look more primary school or more high school depending on the little features you incorporate.

Foods

·      Milk and cookie shots
·      Whoopie pies
·      Apple cake pops
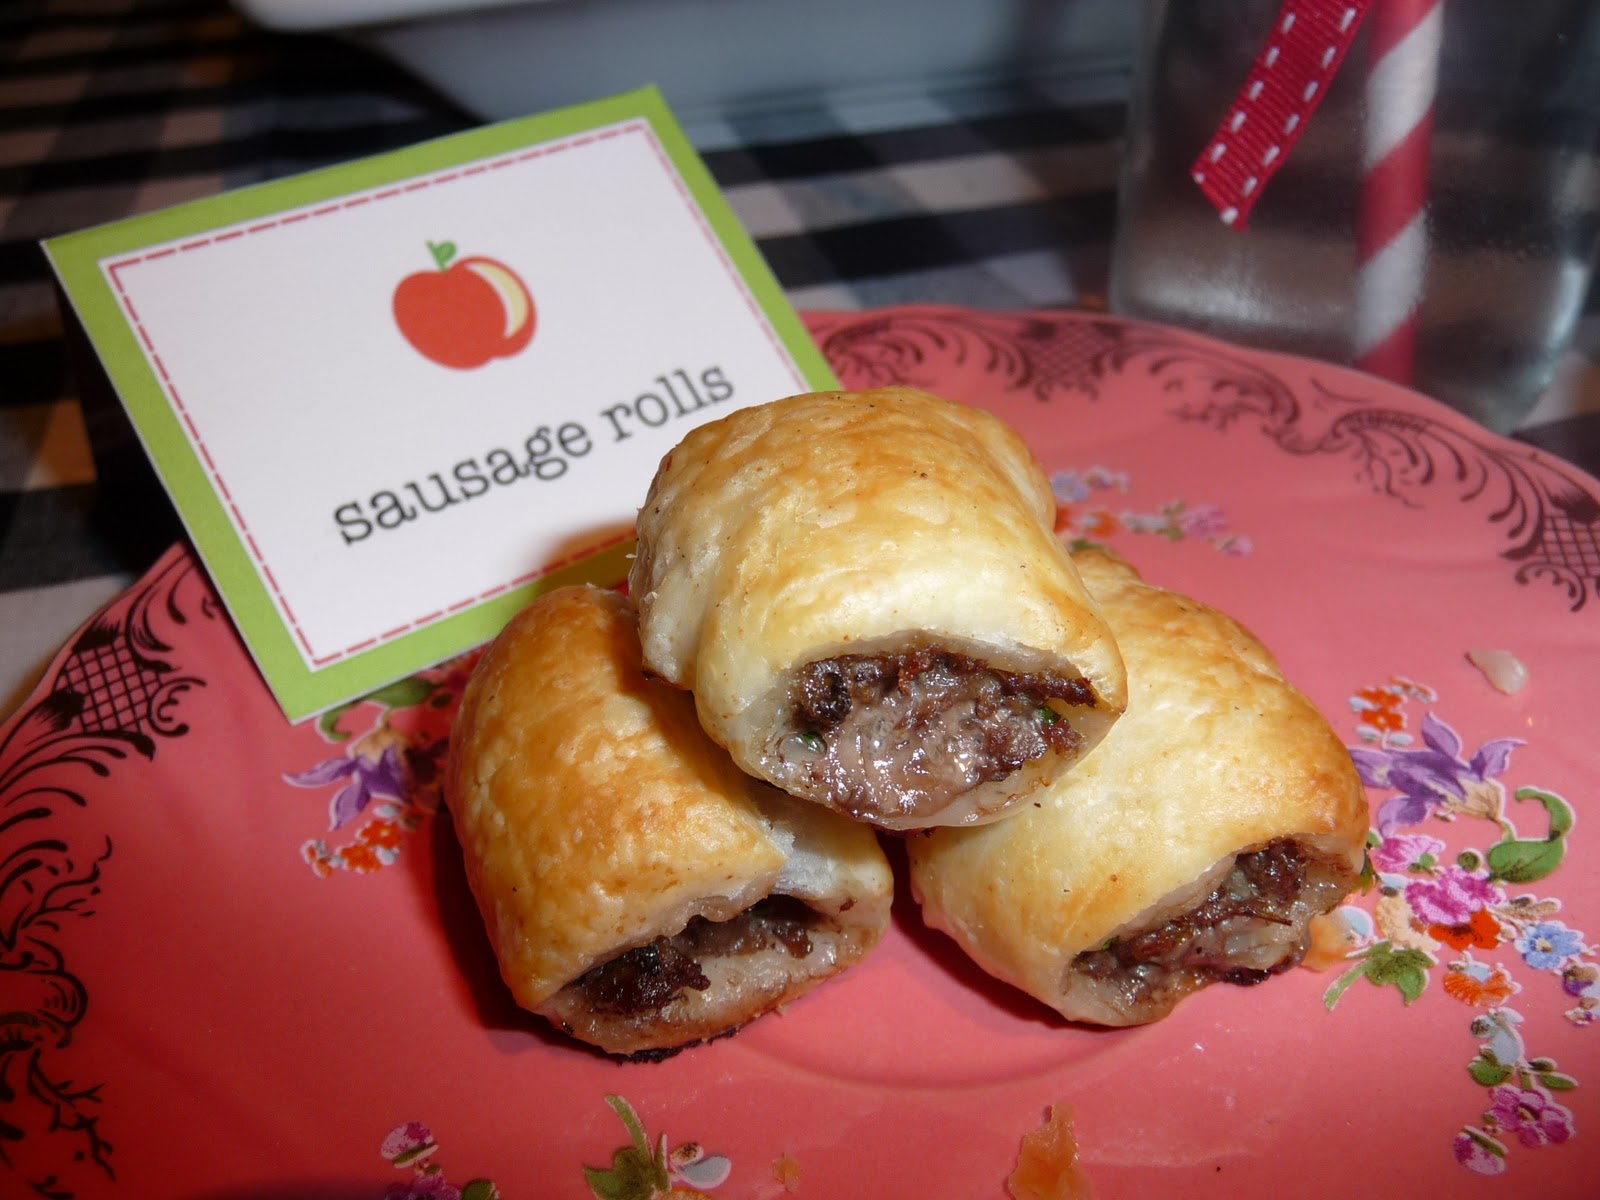
·      Mini sausage rolls
·      Mini sushi rolls
·      Lolly jars in theme colours
·      Mini pizzas
·      Individual serves of nutella (in mini bowls with paddle-pop sticks)
·      Mini sandwiches in various cookie-cutter shapes
·      Mini jam doughnuts
·      Lamingtons
·      Meat pies

Milk and Cookie Shots

Whoopie Pies

Mini Sausage Rolls and Sushi

Apple Cake Pops


Tip – You could do mini versions of your favourite tuckshop/canteen food, lunch-box inspired foods, or foods which are simply cute and thus ‘kiddy’.

Games and Activities

·      Film and TV – Watch Glee, Clueless, 10 Things I Hate About You etc
·      Choir practice - playing karaoke
·      P.E. - Wii sports
·      Maths - Uno, Cranium
·      Business - Monopoly
·      Recess - Eating!
·      Drama - Sharades/Guesstures

I hope that you are inspired to throw your own party as you head back to Work or School, taking the opportunity to celebrate, simply for the pleasure of embracing all those random events in the year besides your typical birthday and Christmas festivities! For there is always some special day or event upon which one can utilise an excuse to throw a themed par-tay!

Happy Celebrating.

Monday, 19 December 2011

Raspberry Cheesecake Brownies


Lovingly adapted from Taste.com


For a while now I’ve been on an indoor pilgrimage to find the perfect cheesecake brownie. One where the textures compliment each other, with a lovely and smooth cheesecake, and an extra-fudgy brownie.

Some were disappointing, where the brownie was not brownie but more akin to a chocolate sponge cake. But this recipe delivers. Whilst there is no crisp brownie edge, there are no dried out bits, and the raspberries add that little something extra. One piece is not enough, which depending on the way you look at it could be a good or a bad thing….

Ingredients

Brownie:

200g 70% Cocoa Chocolate
200g Butter
250g Caster Sugar
3 Eggs
110g Plain Flour

Cheesecake:

400g Cream Cheese
150g Caster Sugar
2 Eggs
2 tsp Vanilla Extract
Frozen Raspberries

Method

Preheat oven to 160°C (fan forced). Grease and Line a 20cm x 20cm baking tin.

Brownie:
Melt chocolate in a heat safe jug and set aside to cool.
Cream butter and sugar until pale, then beat in the eggs one at a time.
Stir in the melted chocolate, then fold in the sifted flour.
Spread mixture into the pan.

Cheesecake:
Beat the cream cheese, sugar, eggs and vanilla until smooth.
Spread mixture over the brownie layer.
Push desired number of raspberries into the surface (next time I would squish in a few more than shown).


Bake for 45 minutes (centre will still be quite wobbly). Leave to cool, then refrigerate overnight. Do not be tempted to eat before, as these are so much better once they are set and cold, trust me! When ready for a brownie-feast the next day, cut into 16 and enjoy!


Notes

The beaten brownie batter was rather pale, which at first caused me concern due to my love of ultra-chocolate-ness. Upon serving the next day however, the revealed brownie layer was a deep chocolate colour and decadent in its flavour, phew!

You could even place raspberries between the brownie and cheesecake layers as well as on the top, for an extra raspberry hit.

The images show a ¼ of the brownie mixture reserved and swirled into the cheesecake, I would skip this as it is a mere visual which is a bit messy. By doing two distinct layers, the lovely red raspberries are more visible on the surface. 

Sunday, 11 December 2011

Wholemeal Berry Ricotta Scones


Lovingly adapted from 'Whole wheat raspberry ricotta scones' by Smitten Kitchen.


These scones take the old lady out of scones. They are a little bit grownup (by using ricotta, berries and wholemeal), moist in texture (unlike many unfortunate scones), and extremely scrumptious, whilst still being simple to make. These are great as a refreshing take on one’s Sunday breakfast treat (as I know that we all rarely deviate from our beloved pancakes)...

Ingredients

2 cups Plain Wholemeal Flour
1 tbs Baking Powder
1/4 cup Sugar
80g Butter
250g Frozen Mixed Berries
1/3 cup Evaporated Milk
250g Light Ricotta

Method

Preheat oven to 220°C (fan forced), line two baking trays with baking paper.

Place flour, baking powder and sugar in a large bowl and mix.

Cube the butter, add to the flour mixture and rub in using fingertips until the flour is like breadcrumbs in consistency.

Using a spatula, mix in the berries. Then add the milk and ricotta and mix until the flour is just combined into a dough.


Place dough onto a floured surface, and sprinkle it with flour. Using hands, mould the dough into a rectangular shape, of about 1inch in thickness.


Cut into 12 segments, and bake for approximately 15 minutes. Eat instantly : )

Notes

The scones may be ever so slightly underdone after this amount of cooking time, but the residual heat present after they are removed from the oven, and before they are served is enough to make the scones non-doughy, but not too much cooking so as to have dried out scones (which is not so nice either).

These have such yummy ingredients in them that there is no need for any condiments, just eat them straight!

Happy baking.

Thursday, 8 December 2011

Cookie Dough and Marshmallow Cupcakes


So these are pretty awesome…the idea is inspired by a similar recipe by joy the bakerI decided to change it up a bit though…


Because it is rather indulgent, I decided to go with a classic cupcake, as opposed to a chocolate one and then use a rich double choc cookie dough instead of peanut butter. Every time I see the method description "...just beat in a bowl over a pot of simmering water…” I head for the hills, thus, in my ability to avoid such a task I have used a cheat’s marshmallow frosting, no simmering water or cream of tartar required!

Cupcakes

Ingredients

2 Eggs
4oz Butter
6oz Sugar
8oz Self-raising Flour
2/3 cup Milk
2 tsp Vanilla Extract

Method

Preheat oven to 180°C (fan-forced). Line a 12 hole cupcake tin with cupcake papers.

With electric beaters, beat eggs, butter and sugar until well creamed.

Add the vanilla, then approximately 1/3 the milk and 1/3 of the flour, and beat in well. Repeat until all the milk and flour is added.

Divide batter evenly between the 12 cupcake wells, and bake for approximately 15-20 minutes, until a skewer comes out clean.


Cookie Dough

Lovingly adapted from the ‘double chocolate cookies’ recipe in Simple Essentials: Chocolate by Donna Hay.

Ingredients

100g good-quality Dark Chocolate (>50% cocoa content)
50g butter
¾ cup Brown Sugar
¼ cup Cocoa Powder
1 cup Plain Flour
1 tsp Vanilla Extract
1 Egg

Method

Sift flour and cocoa into a small bowl and set aside.

Place chocolate, butter and sugar in a microwave-safe jug. On medium-low power, microwave in 1-minute increments, stirring each time, until completely melted and combined. Do not over-heat otherwise the chocolate may burn.


Once chocolate mixture has cooled slightly, add the vanilla and egg, and mix-in thoroughly.

Then, add in a little of the flour mixture to the chocolate mixture and completely combine before adding more flour. Repeat this until all the flour is added and combined.

Roll the dough into balls of your desired size (mine were about 3cm in diameter).  You will only need 12, so any leftovers can be eaten (recommended) or stored in a container in the fridge for use as cookie-dough pops (equally recommended).

Marshmallow

Lovingly adapted from the ‘home-made marshmallow crème’ recipe in Whoopie Cakes by Susanna Tee.

Ingredients

80g Icing Sugar
3 Egg Whites
250g (approximately) Glucose Syrup
Pinch of Salt
3 tsp Vanilla Extract/Vanilla Bean Paste

Method

Using an electric mixer, beat egg whites, syrup and salt on high speed until thick and doubled in volume. Add the vanilla, and beat in well.

Slowly add the sifted sugar whilst the mixer is on a low speed, until well combined.


Assembly

Place ball of cookie-dough onto the top of each cooled cupcake. Then using a piping bag with a large nozzle hole, pipe marshmallow in a circular motion, stating at the cupcake and working your way up, around the cookie-dough.


Use a blowtorch to toast the marshmallow. Can’t give advice on this aspect as I don’t have one in my possession…we attempted using matches (not recommended), was a rather epic fail. Makes them taste bad, and took about a million of them to achieve a faint brown colour.


Notes

If you don’t want to do all these parts in one day, the cookie-dough balls and cupcakes can be stored in the fridge, and then assembled when you are ready to eat them in the next day or so.

If you are lucky enough to have leftovers, the assembled cupcakes can be stored in the fridge for about 3 days, after that, the marshmallow starts to separate and go a bit gross.

Happy baking.